Friday, 17 April 2015

How to update National Instruments myRIO firmware and Real-Time

myRIOThe National Instruments myRIO requires to have the same Real-Time module  installed on as the one that is installed  with LabVIEW to be able to use, if an old version is installed on the myRIO then when you plug the myRIO in the "NI myRIO USB monitor" will disable LabVIEW from the menu (see fig 1), if you are using the latest version of LabVIEW then you will need to update the firmware* or use an older version of LabVIEW.

* Updating the firmware will delete all code installed on the myRIO.
 Instructions on how to update the BIOS and firmware on the myRIO:

Tuesday, 17 March 2015

Brady label printers

Looking for a label printer? Fisher Scientific - Laboratory supplies & equipment ... are a supplier of Brady label printers

Visit http://www.fisher.co.uk/

Catalogue March 2015 -  Laboratory_Identification_Catalogue_Europe_English-1 (5)

Wednesday, 4 March 2015

LabVIEW 2014 myRIO not working

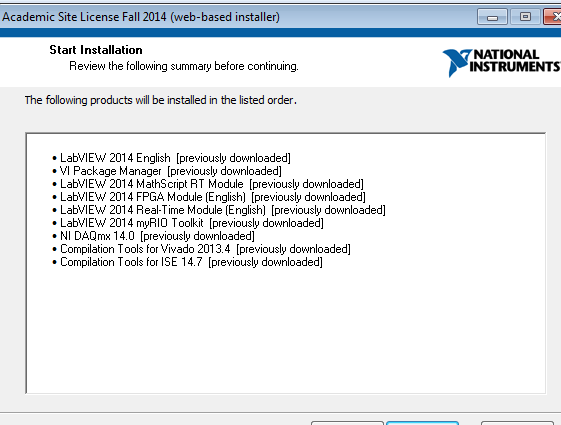
When installing LabVIEW 2014 and selecting the myRIO toolkit it doesn't automatically select a required module, you will need to select the LabVIEW 2014 Real-Time Module. This will install the myRIO examples and the Vi's required also it then adds the myRIO environment this changes the splash screen to display "LabVIEW myRIO 2014"

NI-myrio


http://www.ni.com/myrio/

Monday, 23 February 2015

PC Engines APU1D

The APU1D from PC Engines (released end of March 2015)

The CPU is a AMD G series T40E 1 GHz dual bobcat core with 64bit support, has 3 on-board Gigabyte network sockets and supports m-Sata SSD and one SATA plus power connector, and for expansion have 2 miniPCI express slots. The board has two options for memory the APU1D has 2GB and the APU1D4 has 4GB. The power ranges from 6 to 12 watts and is powered by a just 12v PSU.

APU1D image of board

Full hardware specification can he found here http://www.pcengines.ch/apu1d.htm

Sunday, 14 December 2014

Arduino tells the time in words

Arduino WORD CLOCK Project

Found this project Micro Word Clock and decided to give it a go, I couldn't find any code for Arduino so I mashed up some code, the code works however I want to add a flashing asterix to show seconds.

Equipment needed:

  • Arduino Uno

  • 8x8 LED Matrix with MAX7219

  • SparkFun Real Time Clock Module (DS1307)


The 8x8 LED matrix is 32mm x 32mm  so the math was easy each cell needed to be 4mm², I started by using Microsoft EXCEL to get the letters in a grid however I couldn't get the cells size to be 4mm X 4mm ( 3.97mm X 3.97mm) so I tried Openoffice and guess what no problem.  Once all letters was added you need to center text left to right and top to bottom, make all cells background black and text white, the font I used was consolas size 8.  I have added the files with the source code on github.

Wiring:

RTC DS1307

  • Connect SCL to A5

  • Connect SDA to A4

  • Connect 5V and GRD


MAX7219 - 8x8 LED MAtrix

  • Connect DIN to Pin 8

  • Connect CS to Pin 9

  • Connect CLK to Pin10


Code:
https://github.com/catchcoder/arduino/tree/master/Max7219_8x8led_with_RTC

Images:

IMG_0636 IMG_0637

Monday, 8 December 2014

How to enable SPI on Raspbery PI and enable SPI module for Python


  • Enable SPI on Raspberry PI

  • Enable SPI for use in Python


Enable SPI on Rasperry PI


From the command line type:
sudo nano /etc/modprobe.d/raspi-blacklist.conf

You will then see
2014-12-04-100914_568x125_scrot


Comment out the blacklist spi-bcm2708 by prefixing it with #

2014-12-04-100618_533x137_scrot


 Press and hold 'CTRL' and press 'O',  then press 'ENTER', then close nano with 'CTRL' + 'X'

You will need to reboot the type:
sudo reboot

When it has restarted you can test if it is working by typing 'lsmod', this display kernel modules loaded, you can wee from the image below the spi_bcm2708 module is now loaded,

2014-12-04-101948_405x237_scrot


SPI is now enabled on the Raspberry PI


 Enable SPI for use in Python


To enable SPI to be used in python you need to install the python module for interfacing with SPI.

You will need internet access so you can download the code from github.
git clone https://github.com/doceme/py-spidev

2014-12-04-105003_609x43_scrot


Once you have cloned the py-spidev you will need to change to the directory and use python to install  the module.
cd py-spidev
sudo python setup.py install

2014-12-04-105310_575x147_scrot


It is now possible to use import spidev more information can be found here http://tightdev.net/SpiDev_Doc.pdf
import spidev

Thursday, 16 January 2014

Free Windows software

Video Tools

  • Handbrake - HandBrake is a tool for converting video from nearly any format to a selection of modern, widely supported codecs. http://handbrake.fr/

  • VLCPlayer - Open-source cross-platform multimedia player and framework, which can also stream audio and video in a number of formats - https://www.videolan.org/vlc/index.html


Linux Tools

Editors

Hard disk tool

File managers

  • Free commander -  is an easy-to-use alternative to the standard windows file manager. The program helps you with daily work in Windows http://www.freecommander.com

  • Total commander - a file manager replacement for Windows 95/98/NT/2000/XP/Vista/7. http://www.ghisler.com


Compression

  • 7zip - is a open source file archiver with a high compression ratio. GUI and command line options. GNU LGPL license. http://www.7-zip.org


WIFI Scanner